Want to turn your handmade hustle into real sales on Facebook without chasing scams? Let’s break down a practical, friendly approach that stops the headaches and keeps your profits intact. I’ll share real-world moves from a maker who’s been there and figured out what actually works.
Separate Personal from Business, and Focus on Safe Listings
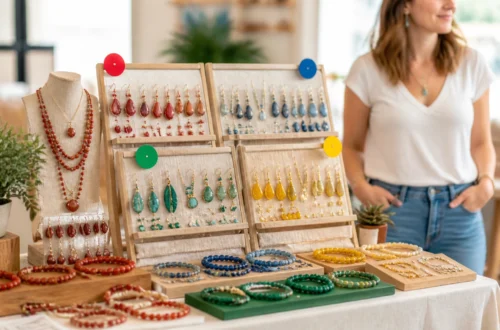
First up, protect your peace by keeping your personal and business profiles distinct. When you start a business page, you’ll quickly notice the temptation to flood the feed with all your inventory. That’s not always the best move. Instead, post clear, eye-catching photos of items you have for sale and direct people to a safe listing. FYI, linking to a trusted online storefront (like Etsy) helps everyone stay organized and minimizes direct messages that open the door to scammers.
Why link to an official listing? It centralizes payments, taxes, and delivery options, so you don’t end up fielding a million “Is this still available?” messages from random strangers. It also makes it easier to mark items as paid and delivered, whether you ship or hand-deliver to people you actually know.
Before you post, think about privacy. Keep your home address and personal details off your page. Share your work, not your personal life, and use the storefront path that keeps your information safe.
The Power of a Simple, Link-Driven Strategy

If listing items directly on Facebook felt clunky or exposed you to scammers, a streamlined approach works much better. Copy the listing link from your online store and share it on your Facebook business page. This gives buyers a clean path to purchase and payment protection from the platform hosting your storefront.
This method also allows you to set clear terms—like payment through Etsy or your chosen platform, shipping options, and whether you’ll deliver in person. The more you spell out, the fewer misunderstandings you’ll have later. And yes, you can still offer local pickups, but only with buyers you know to protect yourself.
Build Your Page’s Credibility Through Social Proof
People want to buy from makers they trust. When your page shows steady, genuine engagement, it becomes a magnet for new buyers. Encouraging friends and customers to share your posts is a free, powerful boost—no ad spend required.
How can you gather that buzz without sounding pushy? Ask satisfied customers to leave a quick comment or share a link to your listing. Be grateful, not pushy. A little social proof goes a long way in reducing buyer hesitation and hitting your first big sale.
Remember, not every viewer will convert, and that’s OK. Consistency over time builds momentum, and so does showing up with fresh photos and clear pricing.
Handling Payments and Delivery Without Drama

The goal is simple: get paid securely and ship or deliver confidently. By routing transactions through a trusted storefront, you reduce the risk of chargebacks and payment issues. If you ship, provide tracking and clear estimated delivery times. If you hand-deliver, limit it to people you know to keep things safe and friendly.
Transparency matters. Outline your terms in a pinned post or a dedicated FAQ: accepted payment methods, shipping costs, delivery options, and return policies. The more upfront information you share, the fewer rounds of messages you’ll need to chase down.
The Role of Community and Sharing
Your maker network is a goldmine. If you have maker friends or neighbors who love to support each other, lean on them for a boost. Sharing each other’s listings increases exposure for everyone involved. It’s a win-win: free promotion and a sense of community that keeps you motivated.
FYI, social media algorithms love engagement. The more comments, shares, and saves your posts get, the more people see them. So don’t be shy about asking your friends to share a post or tag someone who might love your work.
Practical Setup: What You Need Ready to Go

Before you post, have a few things lined up. High-quality photos, a short but descriptive product title, clear price, and a direct link to your storefront are non-negotiables. If you can, include a quick shipping or pickup note and any customization options. People love knowing the details at a glance.
Set expectations for timelines and how you’ll handle questions. The faster you respond, the more likely you’ll convert curious visitors into buyers. And don’t forget to stay organized—tracking orders sounds boring, but it saves you from mix-ups and disappointed customers.
A Quick Personal Note: Authenticity Wins
The maker journey is a marathon, not a sprint. When you present yourself authentically, buyers feel you’re approachable and trustworthy. Share a bit about your process, your workspace, and why your crafts matter to you. People buy the story as much as the product, and a friendly, real voice helps you stand out in a crowded feed.
IMO, you don’t need to be perfect—just consistent and transparent. If something changes about your process or policies, update your followers quickly and clearly. Consistency builds confidence, and confidence sells.
FAQ
How do I avoid scams on Facebook when selling handmade items?
Keep transactions off-platform whenever possible by directing buyers to a trusted storefront. Use secure payment methods through that storefront and avoid sharing sensitive information in chat. If a deal sounds too good to be true, it probably is. Trust your gut and back away.
Is it better to ship items or offer local pickup?
Shipping through a storefront with tracking is reliable and scalable. Local pickup can work, but only with people you know and trust. Always verify addresses and require payment before handing over goods when possible.
What should I include in my product posts?
Include clear photos, a concise title, price, and a link to your storefront listing. Add shipping or pickup details, and mention any customization options. A pinned post with policies helps reduce back-and-forth questions.
How can I get more eyes on my listings without paying for ads?
Engage your network and ask friends to share your posts. Post consistently with fresh photos, and respond quickly to comments. Collaborate with other makers to cross-share listings for mutual exposure.
What’s the best way to handle payments and delivery?
Use a reputable storefront for payments to handle taxes, refunds, and fees. Ship with tracking or offer trusted in-person delivery to buyers you know. Keep receipts and confirmations for every order.
Conclusion
Selling handmade crafts on Facebook can be safe, simple, and scalable when you lean on a trusted storefront, keep personal and business separate, and build credibility through consistent, authentic engagement. Link your Facebook posts to your online shop, share with your network, and stay organized with clear policies. With a little patience and some smart moves, you’ll turn casual visitors into repeat customers—without the drama.